Any time I have an excuse to bake cupcakes, I take it and run like the wind. You should know that by now.
Wednesday night, Ray and I attended The Essential New York Times Cookbook Philly Food Blogger Potluck and Book Signing, hosted by NYT food columnist and food52 founder Amanda Hesser, Audra Wolfe of Doris and Jilly Cook, Marisa McClellan of Food in Jars and Victory Brewing. Attendees were encouraged to bring their favorite dish from the NYT, whether it be the paper, a cookbook, or even the newest cookbook.
I'll admit, I'm not much of a Times girl, or really any newspaper for that matter. I knew roughly what I wanted to bring (cupcakes!), so I scoured the online NYT in search for a wild and crazy cupcake recipe.
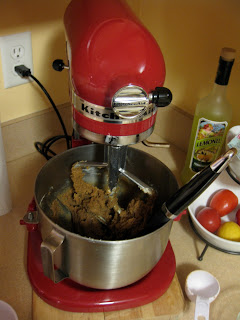
Unfortunately, my search only brought up approximately three recipes. One contained peanut butter, which I skipped because of Ray's allergy, another was a "Hostess" style cupcake (ew), and the final and acceptable recipe was for Devil's Food Cake cupcakes with chocolate ganache. Classic, yet a little boring for the likes of me.
My first thought was to take some of the lovely raspberry jam my friend Jen gave me this summer and fill the chocolatey delights with it. But being that it was 8:00 when the cupcakes came out of the oven AND the cake seemed very light, I nixed this idea. No need to massacre 30 cupcakes in an effort to fill them with jam and stay up until midnight. Not on a week night.
Instead I let them cool in my office, with the window thrown open. I took that time to shower and make the ganache, which was suspiciously simple. Then after an hour or so of cooling, I dipped each cupcake in the thick chocolate, gave it a twirl and voila! Cupcakes.
Ray and I had a great time at the potluck. There was a great variety of finger food-style dishes, including three pimento cheese dips (oh so good). I thoroughly enjoyed Marisa's broiled lemon and spinach salad, and my friend Derek's peanut-topped sesame noodles.
I enjoyed chatting with Amanda in between bites of the aforementioned noodles, discussing peanut allergies and the joys of homebrewing. She seemed intrigued by Ray and my beer-making hobby, and we were more than happy to talk about recipes, mishaps and the benefits of a good homebrew. The cupcakes were a hit, and I encouraged people to pair them with Victory's Storm King Imperial Stout, a beer that I spent a lot of time with that night.
Ray and I also chummed up with Dave from Victory Brewing, sharing some of our homebrews with him and some fellow potluckers. Definitely a fantastic night.
Animals quote
"Animals give their lives to feed us, so it's on us to eat every part of them. It's a form of respect, and it's a better way to live than just treating meat as a disposable commodity." —Seamus Mullen, Chef
12.10.2010
12.08.2010
My Soup Obsession Part I — Sweet Potato Soup
I've been obsessed with soup lately. Even though I bring my lunch to work (sandwich, fruit, veggies), I almost always buy a cup of soup from the cafeteria. And I get supremely cranky when they don't have anything good.
Maybe it's the weather. The temperatures here in the Philly metro area have finally sunk below 40 and there's a chill in the air. Maybe it's because a pot of soup—when I make it at home—goes a long way, giving Ray and myself several nights of warm, comforting soup. Maybe it's both.
Recently, I made a luscious sweet potato soup. Velvety and thick, my first version had a half pound of cheddar grated into it. It was highly enjoyable, but I thought I should try it again, this time without so much dairy. This is the result:
Sweet Potato Soup
Ingredients
1 pound sweet potatoes, peeled and cubed
1 onion, chopped
1 clove garlic
1 carrot, peeled and chopped
1/4 cup flour
1 3/4 cup water
1 1/2-2 cups low sodium chicken broth
1-2 tbsp half and half or light cream
Hot paprika
Salt
Pepper
3 strips of duck bacon, or any kind of bacon (optional)
1-2 tbsp butter (if skipping bacon)
Render the fat out of the duck bacon in a large, nonstick stock pot. Once the bacon is done, drain it on paper towels and trim extra fat gristle. Set aside.
If not using bacon, heat 2 tablespoons of butter on medium high heat in the large, nonstick stock pot. Once melted (or once bacon has been removed), add onion and garlic, as well as a pinch of salt and some pepper. Cook until aromatic.
Add carrot and sweet potatoes. Stir to coat. You can also add a tablespoon of butter at this point if it looks like you need it for better coating. Turn the heat down to medium, put the lid on, and let the veggies cook down for approximately 20 minutes, stirring occasionally.
Once the sweet potatoes and carrots are tender, add the flour to the cup of water and whisk. Slowly add to the pot, stirring. Let simmer for 5 minutes. Add chicken broth (or vegetable broth if making this a vegetarian dish) and simmer for another 15-20 minutes.
Take the pot off the heat and let it cool a little. Use an immersion blender to puree the soup (if using a blender, let the soup come all the way down in temperature for safety reasons).
Once sufficiently pureed, put the pot back on the heat at medium. Add the half and half or light cream and stir to incorporate. Add hot paprika, salt and pepper to taste.
Crumble the bacon and add to the soup. Let the soup simmer for an additional 15-30 minutes on medium-low heat. If it seems a bit thick, add some room-temperature water until it's at your desired consistency.
I love this soup. It's comforting and satisfying. Writing the recipe was a bit difficult though, because I tend to cook off the cuff. I was inspired by the Cheddar Potato Soup with Bacon recipe I found using my handy Epicurious app, but obviously made a lot of changes.
I also did a lot of "add a little of this, a dash of that," especially when it came to seasoning the soup. I think that's great for cooking, but a pain in the neck for when you want to explain HOW you did it. Baking, however, requires a fairly strict adherence to the recipe—it's much more like chemistry.
11.04.2010
Apple Pie Contest
Because we had so much fun at the Collingswood Farmers Market Peach Pie Contest back in August, when Betsy from the market emailed everyone about an Apple Pie Baking contest slated for Oct. 23, we jumped on coming up with a recipe. Who doesn't love a good pie contest?
Ray took the lead, incorporating the delicious pie crust recipe we used last time with a riff on the boozy apple pie recipe from The Boozy Baker. He decided whiskey would be our pie's vice, with nearly a cup in the filling and a little bit in the crust. I went with our signature pie look and cut apple shapes out of the dough for the top.
This time, the Collingswood Farm Market crew had the contest highly organized, which was a real pleasure to see, and kept things moving at a steady pace. There were three categories: apple-only, apples with other fruits, and presentation. Like last time, there were more apple-only pies, making up for about 67% of the entrants. There were some really lovely ones in the lineup, and I'm sure they tasted great. Due to health code regulations, the pies couldn't be sampled by market-goers, but there were apple dessert samples from a number of the vendors at the market, which I thought was a nice touch.
Unfortunately, we did not take home the prize, though we did get on the scoreboard with points for presentation, so boo-yah. Once the contest was complete, we snagged our pie and a fork to taste it. The apples were still pretty firm, and the juices were less juice and more solid. The flavor was good, but the spices could have come up a notch. All things we can do next time (as in, Thanksgiving at my parents house).
Cutting the judges' slice `o pie. Judges tasted each pie, taking a bite or two. |
Local celebrity judge Jen Miller, journalist and author of The Jersey Shore: From Atlantic City to Cape May, tasting our pie. |
10.25.2010
On Burning Hands ...
I recently came across a recipe for homemade Sriracha, and because Ray loves the Southeast Asian condiment SO much, I knew I had to make some for him. And the recipe looked fairly easy.
We bought the peppers at the Collingswood Farmers Market on Saturday—I knew I wanted to do a mix of red bell peppers with whatever red hot peppers I could find. I procured 6 "long sweet" hot red peppers from one vendor for $1 and a pint of small red chiles (looked a lot like habaneros) for $2 from a different vendor. I picked up my bulb of garlic and was ready to go (there were already broken down red bell peppers waiting for me at home).
Yesterday I got to work. I roughly chopped the red bell slices, then began breaking down the chilis ... gloveless. I've worked with jalapenos a number of times (even accidentally touched my eyes once after working with them ... ow), and thought nothing of it. Just don't touch my eyes right?
I broke down all the chiles to come up with 12 oz of peppers...not the full pound the recipe called for, but good enough. And then the burning began. I thought it would go away after washing my hands with soap. No. The burning intensified, and left the back side of some of my fingers red and swollen. It sucked.
The pain would blossom anytime I got near the heat of the stove, which was often because I was also making Honey Lemon Apple Jam and Yellow Tomato Soup. Ugh.
Well, it's nearly 22 hours later. My hands feel "warm" and I don't dare bring them near my eyes to wipe away an errant eyelash. One test Ray suggested was to stick a finger in my mouth, under my tongue. If I feel the chili burn in my mouth, the capsaicin is still there. Because I was gloveless AND used my hands to pull out the seeds and ribs, I think my episode ended up being quite unpleasant. Here's hoping it improves (it's not fun wearing a glove to put in contacts.
And to add to your amusement, Ray took me up on the suggestion of comicking my peril. Pain doesn't hurt when it's funny.
Chili pepper image courtesy of flickr user huntz. Some rights reserved.
10.11.2010
Baking for Parties
This past Saturday I had 45+ cupcakes in tow with me as Ray and I ventured over the river and through the woods to our very good friends' house for their daughter's first birthday. When I originally made the lavender honey nut cupcakes, I was texting back and forth with my friend, who seemed interested in the cupcakes. So I did what any sane (or maybe not so much) person would do and offered to bake the same recipe for her daughter's birthday.
I took Friday off 1) to recover from a nasty cold and 2) have more time to bake. I stuck with the original recipe, and purchased frosting pigment to make the cupcake frosting a lovely lavender. The recipe yields more than noted in the book, so 4 batches (which should have yielded 48) landed me with 55+ cupcakes. More than I planned for, but all the better to practice frosting.
I tinted the frosting and got to work making a rose design on each cupcake. I found out quickly that a firm hand and steady pressure was needed to make the lined crisp—otherwise the frosting looked a little droopy. By the end of my mega frosting session (making the buttercream 3 times to cover all the cupcakes), I had a steady hand and was able to knock out multiple cupcakes without stopping.
At the party everyone loved the cupcakes, which had me a little taken aback. Okay, wait, maybe that wasn't it. What surprised me was when people assumed I was a professional baker. They wanted to know where my shop was. My shop? You think I'm a professional? This was the first time I had ever colored frosting!
But it was great to hear. I'll be baking cupcakes for Ray's 30th birthday party in November, and I've made it clear to friends that I'm interested in cupcake-catering their parties as well. I'll be interested to see where this goes.
One thing to note: Strangely enough, a majority of the cupcakes' frosting paled to a light shade of blue-lavender. I was very surprised, but they did ride in the back of the car in a clear container. My thought is that they were somehow light-struck. Has anyone had experience with this?
10.07.2010
Carrot and Red Thai Curry Soup
Before heading out to Denver for vacation, I made an Indian Spiced Carrot Soup with Ginger, from Bon Appetit magazine. It was tasty enough, but I wasn't thrilled with it. I nearly tripled all the spices to get it to the level I wanted, and even then—after using an immersion blender—I just couldn't get it velvety smooth. But we ate it anyway.
Last weekend we had friends over, and I took another stab at the soup, this time channeling Denver's Root Down restaurant and its Organic Carrot & Red Thai Curry Soup. That soup was luscious, smooth as velvet and with the perfect pow! of curry. It was love at first sip.
Here is my version of the soup, using the original Indian Spiced Carrot Soup with Ginger recipe as a humble base and taking it from there. My one suggestion is to constantly taste and season the soup to your liking—that's the only way you'll get this to work for you.
Ingredients
• 2 teaspoons dried coriander or 2-3 teaspoons of coriander seeds
• 1/2 teaspoon yellow mustard seeds
• 3 tablespoons sesame oil
• 1/2 teaspoon curry powder (preferably Madras)
• 1 tablespoon minced peeled fresh ginger
• 2 cups chopped onions
• 1 1/2 pounds carrots, peeled, thinly sliced into rounds (about 4 cups)
• 1 lime, zested
• 1-2 tablespoons red curry paste; more to taste
• 4 cups Thai culinary stock (can be found at Wegmans) and 1 cup vegetable stock (if you can't find the Thai stock, use 5 cups of vegetable stock)
• 2 teaspoons fresh lime juice
• 1 cup light cream
Directions
1. Grind coriander and mustard seeds in spice mill.
2. Heat sesame oil in heavy large pot over medium-high heat. Add ground seeds and curry powder; stir 1 minute.
3. Add ginger; stir 1 minute.
4. Add onions, season with salt and pepper, and sauté until onions begin to soften, about 3 minutes.
5. Add red curry paste, thoroughly incorporating it. Add the lime zest and carrots. Cook down for 5-10 minutes, until carrots are tender.
6. Add 5 cups total broth; bring to boil. Reduce heat to medium-low; simmer uncovered until about 30 minutes. Cool slightly.
7. Working in batches, puree in blender until smooth. If you want the soup to be super smooth and light, then pass the soup through a mesh sieve, pressing all the liquid out of the solids. Discard the solids (or keep to make carrot ravioli) and put the liquid back into the pot.
8. Add lime juice, and more red curry paste to taste. Add 1 cup of cream if you'd like it a little creamy, more if you'd like the soup to be thicker. Finish with salt and pepper.
Last weekend we had friends over, and I took another stab at the soup, this time channeling Denver's Root Down restaurant and its Organic Carrot & Red Thai Curry Soup. That soup was luscious, smooth as velvet and with the perfect pow! of curry. It was love at first sip.
Here is my version of the soup, using the original Indian Spiced Carrot Soup with Ginger recipe as a humble base and taking it from there. My one suggestion is to constantly taste and season the soup to your liking—that's the only way you'll get this to work for you.
The soup paired with my good friend Derek Lee's recipe for Caramelized Onion Bread Pudding |
• 2 teaspoons dried coriander or 2-3 teaspoons of coriander seeds
• 1/2 teaspoon yellow mustard seeds
• 3 tablespoons sesame oil
• 1/2 teaspoon curry powder (preferably Madras)
• 1 tablespoon minced peeled fresh ginger
• 2 cups chopped onions
• 1 1/2 pounds carrots, peeled, thinly sliced into rounds (about 4 cups)
• 1 lime, zested
• 1-2 tablespoons red curry paste; more to taste
• 4 cups Thai culinary stock (can be found at Wegmans) and 1 cup vegetable stock (if you can't find the Thai stock, use 5 cups of vegetable stock)
• 2 teaspoons fresh lime juice
• 1 cup light cream
Directions
1. Grind coriander and mustard seeds in spice mill.
2. Heat sesame oil in heavy large pot over medium-high heat. Add ground seeds and curry powder; stir 1 minute.
3. Add ginger; stir 1 minute.
4. Add onions, season with salt and pepper, and sauté until onions begin to soften, about 3 minutes.
5. Add red curry paste, thoroughly incorporating it. Add the lime zest and carrots. Cook down for 5-10 minutes, until carrots are tender.
6. Add 5 cups total broth; bring to boil. Reduce heat to medium-low; simmer uncovered until about 30 minutes. Cool slightly.
7. Working in batches, puree in blender until smooth. If you want the soup to be super smooth and light, then pass the soup through a mesh sieve, pressing all the liquid out of the solids. Discard the solids (or keep to make carrot ravioli) and put the liquid back into the pot.
8. Add lime juice, and more red curry paste to taste. Add 1 cup of cream if you'd like it a little creamy, more if you'd like the soup to be thicker. Finish with salt and pepper.
9.30.2010
SAME Cafe — So All May Eat
The last full day we were in Denver we made it over to the SAME Cafe, a place I had put on our "to-do" list months ago, and we were delighted. The slices of pizza we had (California Chicken and Margherita) were super fresh. The crust was crisp and flavorful, the veggies delicious, and the sauce ... my god the sauce. We also enjoyed the fresh fruit salad (juicy cantaloupe and pears), Asian Chicken Slaw (pineapple, cucumber, cabbage, carrots and chicken) and a modest coffee-mug full of Corn & Squash Stew (squash, corn, lentils, green beans, celery, peppers, potatoes in a light broth).
Sure, the food was fresh and tasty, but that wasn't the main reason we were drawn to the little cafe on E. Colfax Ave. Instead, it was the mission and concept behind SAME that drew us in.
SAME stands for "So All May Eat." Started by Brad and Libby Birky out of a desire to give back, SAME is a "pay what you want" cafe, which also offers the opportunity to receive a meal for an hour of volunteering. That could involve sweeping the floor, doing dishes, serving patrons or even making yourself handy in the kitchen.
This does not make it a place to get a "cheap" lunch. Instead, this allows anyone the opportunity to get a good, healthy meal—from those with to those without. Those who can pay often contribute double to triple what they would have paid in a typical restaurant—I know Ray and I contributed at least $30 for our meal. And those who can't, often the homeless, instead give what they may have or give an hour of their time for a meal. This fills their bellies and let's them feel good about themselves—at SAME, everyone is treated equally.
Moreso, as we marveled over our pizza (better than we've had at some places), Ray made a very good point: For the homeless who volunteer their time in exchange for a meal and opt to work in the kitchen, they are learning marketable skills. Sure, it might not land them in The French Laundry, but good kitchen skills are skills, no matter where you pick them up. And I'm sure with a recommendation from Brad and Libby, this could get someone off the streets and into a job. Maybe it's at a fastfood joint, but it's a start, and it means that if someone is determined enough, they can take themselves even farther, maybe even to The French Laundry.
SAME's menu changes daily, but it always seems to offer 2 pizzas, 2 salads and 2 soups/stews. Their meals are mainly organic, and they are only open for lunch. And it is certainly going to be a place we go to anytime we're in Denver.
9.22.2010
Denver Eats & Treats
We've had some amazing meals while in Denver, and our trip is only halfway through! Let me share some of them (excuse the photo quality...these were taken with my iPhone, often in low light):
Machu Picchu pancake from Snooze: quinoa and cornmeal base, sunflower seeds, blueberries, and a drizzle of agave syrup. |
Half order of the Backyard BBQ Benny from Snooze: housemade corn bread topped with slow-cooked Niman Ranch BBQ Beef, poached eggs, smoked cheddar hollandaise and diced pickles. |
Rumaki from Jonesy's Eat Bar: bacon-wrapped water chestnuts in a whiskey glaze with spicy pineapple chutney. |
Seafood risotto from Jonesy's Eat Bar: shellfish (scallops, shrimp, calamari, mussels, cockles) sauteed with garlic, basil, tomatoes, saffron and brandy. |
Half orders of dessert from Jonesy's Eat Bar: Chipotle ice cream topping a dark chocolate brownie (left) and dulce de le leche pudding with sea salt. |
Burgers from Rackhouse Pub: Spiced Burger with– hot spiced beef, cool jalapeño cream cheese on challah and Bison Burger with cambozola, fresh tomato, whiskey onion on challah and side of beer baked mac and cheese. |
NYC Scramble from Water Course Foods: scrambled eggs, sundried tomatoes, spinach, carmelized onions, roasted garlic, basil and brie with sweet potato homefries, homemade biscuit and homemade raspberry jam. |
Colorado lamb sirloin from Wynkoop: marinated and grilled lamb sirloin served with mushroom risotto and herb oil and red wine reduction. |
Breakfast flatbread from Olivéa: crème fraîche, applewood smoked bacon, onions and two sunny side up eggs. |
Organic carrot and Thai red curry soup with apple pear chutney and cilantro from Root Down. |
Carrot gnocchi with baby zucchini, wild mushrooms, Parmesan and carrot-coriander sauce (left) and "Devils on Horseback" cheese and date stuffed peppadew, wrapped in smokey Serrano ham from Root Down. |
Organic risotto: black quinoa, Serrano ham, radicchio, brussel sprouts and a savory vanilla saffron sauce from Root Down. |
Creme fraiche apple pie from Root Down: granny smiths, cheddar crust, chocolate dipped neuskes bacon & rosemary ice cream. |
Whiskey King Pizza from Woody's Woodfired Grill: Whiskey sauce, pulled pork and cheddar on a honey semolina crust. |
9.17.2010
Baby Squirrel Cuteness
So we're in Denver on vacation—one of the best cities in the US—and we decided to do a little recon in some of the neighborhoods, since we want to eventually move here.
We checked out the Cheesman Park area yesterday, which has a HUGE park in the center, and came across this little fella (or lady) on our walk.
I've never seen a baby squirrel before (no, this wasn't a chipmunk, I checked). It was not afraid of us, which I was partly happy about because I didn't want it getting scared into the street, but I was a little concerned with how trusting it was.
It even climbed on to Ray's foot and hung out for a little bit, very curious. It made little chittering noises the entire time, and came over to me when I squatted down to say hello.
Before we left, the squirrel climbed up a tree where it's sibling was taking a nap in the crook of a tree limb. The 2 climbed towards each other and hung out on the side of the tree, looking at us and each other. A very cool part of our day (I'm easy to please).
9.14.2010
Brewfest Chick
On Saturday, my husband Ray had one of his lifelong wishes fulfilled. As he posted on Twitter:
My dream of being married to a hot brewfest chick comes true today. :D
I was lucky enough to see the call for a volunteer to pour at Geraghty's Fall Beer and Food Fest for Sly Fox, and I jumped on it, nailing the gig as the first person to respond. I was ecstatic, and a teeny bit nervous, because I had always been on the other side of the table at fests. But I love beer and can handle taps, so I knew I'd be good to go, and I was. It was awesome.
To read more about my little adventure, check out my post at Bathtub Brewery, the homebrew blog I keep with Ray. You won't be disappointed!
9.07.2010
Smokey Shrimp Chowder
Last weekend, when Ray was off at GameLoop in Boston, I decided to make chowder. I was originally inspired by Real Simple's Shrimp and Corn Chowder with Fennel recipe I had pulled out and saved months ago. However, upon reading the recipe, and the reviews, I started making changes.
I wanted something that would be satisfying, while not too heavy, especially because it's been pretty miserable in the Philly metro area, heat-wise. I also wanted to make sure the chowder stretched a bit, since we don't have a lot of time to cook on week nights. This means making a big batch of something Sunday and living off of it for as long as possible.
Ingredients
• 3 strips duck bacon (I used D'Artagnan uncured smoked duck bacon)
• 3 tbsp unsalted butter
• 1 leek (white and light green parts), chopped
• 1 lb crimini mushrooms, sliced
• kosher salt and black pepper
• 2 cups chicken stock
• 1 lb potatoes, peeled and cut into 1/2-inch pieces
• bay leaf
• 1/4 tsp chicken bouillon
• 1 lb raw peeled and deveined medium shrimp
• 8 oz frozen corn
• 8 oz frozen peas
• 3/4 cup light cream
• 4 tbsp lemon juice
• Dried dill weed to taste
• Hot paprika to taste
Directions
•Thaw shrimp in cool water for later.
• Cook 3 strips of duck bacon in the main pot you'll be making the chowder. Once crispy, drain on a paper towel and set aside.
• Toss chopped leek and mushrooms into the pot with the rendered duck fat. Add 2-3 tbsp of unsalted butter and cook until leeks have softened and mushrooms have reduced in size. Season with salt and pepper.
• Add chicken stock and simmer.
• In a separate pot, boil cubed potatoes with 1 cup white wine and 2 cups water to cover the potatoes. Season with salt and pepper. Boil for 20 minutes, until potatoes are tender.
• Add 1 cup white wine to pot with veggies and chicken stock. Keep simmering.
• Once potatoes are tender, transfer them into the main pot. Reserve their cooking water. Add bay leaf, 1/4 cup white wine, 2 tbsp lemon juice, pepper and 1/4 tsp of chicken bouillon. Cook down for 10 minutes until flavor is concentrated.
• Add concentrated cooking liquid to main pot, along with corn and peas.
• Add the 3/4 cup of light cream, dill and parika. Crumble the duck bacon and add. Simmer for 10 minutes
• Add thawed shrimp and simmer for 5 minutes.
The flavor is great—the smoked duck bacon makes all the difference, in my opinion. I was a little disappointed with the shrimp—I didn't feel like they added much more flavor, so maybe I'll try this with some different seafood in the future. The broth was just right—not too creamy and gloppy, and the potatoes remained tender for a whole week.
Not to mention that the condo smelled wonderful.
8.31.2010
The Boozy Baker—a review
I love to bake, I love cookbooks, so entering Bon Appetit's contest to win a copy of the freshly printed The Boozy Baker: 75 Recipes for Spirited Sweets plus 25 Cocktail Recipes was a no brainer. What made it even better was that I won, which is a pretty rare thing for me.
Written by Lucy Baker (I envy her last name!), a food writer and recipe tester, and a contributing columnist and recipes editor for SeriousEats.com, The Boozy Baker is the kind of cookbook that all the other cookbooks want to be—a little naughty, fun, yet still classy and chic. The photography is great, the book's design is playful with a little hint of kitsch, and there is an excellent variety of baked goods (and cocktails) represented.
Baker provides a rundown on the standard baking ingredients, as well as a breakdown of the liquors used throughout the book, describing the flavor profile. Very helpful, especially to those who may not have spent a ton of time perusing the liquor store shelves or pulling themselves off the local bar's floor at 2 a.m. (kidding!)
From "Old-Fashioned" Snickerdoodles (insert bourbon) to Red Wine Caramel Tart, from the Double Mint Fizz to Almond Iced Tea (both cocktails), there is plenty in this book to keep the creative and slightly offbeat baker entertained in the kitchen. The recipes also leave enough room for the intermediate-to-expert baker to play around, swapping out certain liquors for others to change the dessert at hand.
My only criticism of the book—which has been echoed by other reviews—is the lack of photography. It would have been nice to see more photos of the finished desserts (there were 28 photos out of the 75 recipes), but the images that were included were superb, cohesively styled to match the rest of the book. I also understand that producing and printing a book isn't cheap, so 28 photos in 4-color is better than nothing.
After paging through the book several times, I decided to make the Lavender Honey-Nut Cupcakes and was happy with the results, though slightly tweaked to my liking (seriously, who doesn't make changes to a recipe?) I found the buttercream to be a bit too sweet for my liking, so I backed off the amount of confectioner's sugar that Baker calls for an added a bit more amaretto. The recipe was super easy to follow, and the cupcakes came out DIVINE. So far everyone who's eaten them has raved. It was totally worth winning this cookbook!
8.30.2010
Lavender honey-nut cupcakes
Say hello to the Lavender Honey-Nut Cupcakes, packed lovingly for a lunch in Philly with friends. And yes, they taste as good as they look.
I sourced the recipe from The Boozy Baker: 75 Recipes for Spirited Sweets by Lucy Baker, which I won in a Bon Appetit cookbook giveaway.
I didn't alter the cake recipe (containing almond meal, lavender buds and amaretto), but I did make some changes to the honey-amaretto buttercream. The recipe called for a start of 2 cups of confectioners sugar, then adding an additional 1-2 cups of confectioners sugar. I only had approximately 2-1/4 cups in my cupboard, so I made it work. However, I still noticed that the buttercream is a bit too sweet for my tastes, so next time (I'll be baking these for my friend's daughter's first birthday), I think I'll start with a cup of confectioner's sugar and add a little bit from there.
Because I found the buttercream's sweetness to pop too much, I added a little extra amaretto and a smidge more light cream. I also have lavender honey, but I opted for clover honey because I didn't want one flavor overpowering the rest—I think that was the right decision.
The recipe calls for lavender buds as a garnish as well, but they're kind of hard to manipulate on the buttercream (my objective was not to mangle the tops of the cupcakes with my clumsy fingers). So, as a test, I garnished two of the four cupcakes I gave to my friends and told them to report back.
8.24.2010
You say tomato, I say
... 25 pounds will give you 4 pints of marmalade and 6.5 quarts of canned plum tomatoes.
Following the Peach Party extravaganza at the Collingswood Farmers' Market, I picked up the crate of plum tomatoes I had reserved from DanLynn Farms. Or I should say that Ray picked up the crate, while I paraded our almost-a-win peach pie through the market.
For the rest of the weekend I slaved over the stove, blanching and cooling and peeling the skins from plum tomatoes. Ten pounds were dedicated to a tomato marmalade I whipped up that Saturday night while Ray was at a game developers meeting, and the following day I tackled the remaining 15 pounds to preserve as whole for the winter (though I totally already cracked into one jar for a barley dish I made the other night for dinner).
Tomato Marmalade
Servings: Makes about 4 pints marmalade
Note: Adapted from Valerie Gordon of Valerie Confections.
Ingredients
4 Valencia oranges
6 cups sugar, divided
1/2 cup water
10 lbs plum tomatoes
2 tsp salt
1 tsp black pepper
1. Using a vegetable peeler, peel the skin from the oranges, then slice into thin strips. Juice the oranges, saving 1 cup; the remainder can be saved for another use.
2. Place the juice, 1 cup sugar and the water into a medium saucepan and bring to a simmer over medium-high heat, then add the peel. Continue to heat until the mixture comes to a boil.
3. Reduce the heat to medium and continue cooking until the peel appears slightly translucent and very soft, approximately 10 minutes. Remove from heat and cool to room temperature.
4. While the orange peel is cooling, skin the tomatoes. Cut a small X at the base of each tomato. Bring a large pot of water to a boil, then drop the tomatoes in the water, several at a time. Remove the tomatoes with a slotted spoon when the skin has just begun peeling from the X, about 20 to 30 seconds. Immediately place the tomatoes in an ice bath to stop the cooking, then peel the skin from the tomatoes when they are cooled. Repeat until the skins are removed from all the tomatoes.
5. Seed and roughly chop the tomatoes and place them in a large pot. Stir in the remaining 5 cups sugar.
6. When the orange is cooled. place the chopped orange peel in a small bowl, reserving the poaching liquid.
7. Heat the tomato and sugar mixture over high heat, stirring frequently with a large wooden spoon or heat-resistant spatula. Cook the marmalade until it begins to thicken, about 45 minutes to an hour. (It will boil and bubble furiously while it cooks; stir frequently but not constantly.)
8. Reduce the heat to medium-high and add the poached orange peel, salt and pepper, stirring constantly. Taste the marmalade. If you prefer stronger citrus notes, add some of the reserved poaching liquid now. Continue cooking until the marmalade is very shiny with a thick consistency.
9. Can the marmalade for approximately 10 minutes at full boil. After 10 minutes, turn off the heat and leave jars in the canner for 5 minutes, then remove.
Subscribe to:
Posts (Atom)